Tailbound: Achievements Guide
General Info
This guide was first published on Steam, but I'm the author.
Story/automatic achievements

Alpha, and...
Defeat the Omega Wolf
The Omega Wolf is the end boss of level 1, "Convention".
It's an easy fight, evade his attacks until he charges at a wall and is stunned, wail away. Best hit him from the side or front, as he does a quick backjump when he wakes up. Beware, some times he does 3 quick charges.

My Name is Jonas
Defeat Jonas
Jonas is the end boss of level 2, "Basement".
Evade until he throws his sword, then quickly hit him before the sword returns to stun him. Best keep him near a wall so you can hit more as your knockback quickly pushes him out of reach.

Monster Hunter
Defeat the Veldrake
The Veldrake is the end boss of level 3, "Hotel".
Whenever he appears at the window and puts his claws on the windowsil, don't stand in front of him, he'll come leaping out. Easy prey after he does.

Sticky Situation
Defeat Ataraxios and all of his forms
Ataraxios is the end boss of the game and level 4, "Secret Lab".
He has three phases and he always stuns himself, so just evade until you can strike.
If you didn't find all P-AD cells, there will be constant pink fog during phase 1 and 2 (not during 3). A single graham cracker should be enough, but remember that energy drinks set lust to zero in addition to healing you.
In phase 1, he attacks three times, and sloshes three times, then he brags, which gives you a chance to attack. His attacks are a charge and a single-shot cannon.
In phase 2, it's the same, just that after the third attack he sloshes not again but is instantly exhausted. His attacks are the same with an added scythe strike that does massive damage.
In phase 3, it's the same as in phase 2, except if he has low health (~1/3) he does 5 attacks not 3. The single-shot attack changes to a spread shot and In addition to his scythe attack, he also does a scythe whirlwind. You should try to stay directly above/below him so if he does that attack, he doesn't go all over the room. If he does this attack, he's instantly stunned afterwards no matter how many times he already attacked.

I Survived Netcon 201X
Finish the game
Missable achievements

Fried Buns
Touch grass.
At the very start of the game, enter the building and go left and, well, touch grass.

Kono Sakuya Da!
Defeat the hidden boss, Rykah
Do one of the following:
- After getting the sword at the start of the game, reach the savepoint killing everything and taking no damage, then return to the room where you got the sword and go down the steps.
- Name your character "Reimu", "Marisa" or "Cirno". After getting the sword, leave and re-enter room and go down the steps.
- Start a New Game+. After getting the sword, leave and re-enter room and go down the steps.
Beware, Rykah is a tough nut to crack, the hardest boss of the game by a mile. I don't got any tips for this boss, good luck.
You cannot return to this area after the tutorial, next time will be (next) NG+

Green Man Bad
Discover Alex in Netcon
In level 1, "Convention", right at the start of the level where you arrive after the tutorial, there's a door with a keypad below you.
Enter Code 5010 or 9053

The Alpha Male
Discover Poco in Netcon
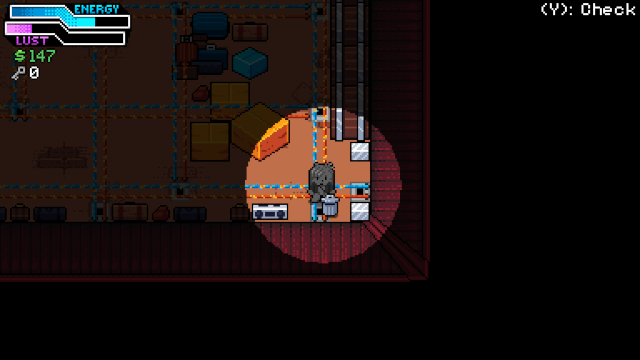
In level 3, "Hotel", after you destroy the Generator, go back to the room right above the room marked with E (where you started the level) and search for a small trashcan.


Gettin' Around
Unlock all normal enemy scenes
Lay all the normal enemies in the game, Kobold, Drago, Avid, Snake, Gelly, Anu (wolf) and Tentacles.
You do not need to lose to all of them, the losing-scenes are unlocked automatically when you lay them.
To lay one, usually you need to hit them in the back to get them stunned. If they didn't notice you yet, that's your chance. Just don't get too close, you have quite a reach.
Other ways to stun them:
| Enemy | Aviability | Tactics |
|---|---|---|
| Kobold | Start of the game | Easiest way is have them notice you, roll past them and hit them in the back while their attack still plays out. |
| Drago | Level 1 | Roll past when they attack or just sneak up on them. |
| Avid | Level 1 | Let them attack three times, then they get confused. Get behind them and show them your sword. |
| Snake | Level 2 | Evade their attack so they overshoot you. |
| Gelly | Level 2, 2nd half | They don't really have a backside. Trick is, get them to notice you. Line up with them and as soon as they turn red, roll away, turn around and hit them. The time frame where they are stunable after their bash attack is small. |
| Anu | Level 2, 2nd half | Best just sneak up on them, they're slow. |
| Tentacles | Level 4 | Hit them without touching their trap or if unavoidable, roll over the trap and then hit them when they bounce around. |

Vice Grip
Unlock ALL scenes in the game
This means all the enemy scenes (See Gettin' Around), All the normal game bosses (need to complete the game at least once) and the secret characters, Rykah, Alex and Poco. See "Kono Sakuya Da!", "Green Man Bad" and "The Alpha Male" respectively.
Also, you need to die by a trap in a room with no enemies at least once

Finished the Fight
Destroy all 8 P-AD cells for the good ending
There are 3 in level 1, "Convention", but only 2 of those can be collected. There are 2 more each in level 3, "Hotel", and level 4, "Lab".
The end boss fight gets a bit easier now.
To find all the P-Ad cells, check my other guide, Annotated maps
The ending cinematic doesn't seem to change, tho.

Ramblin' Man
Listen to everything Ashe has to say
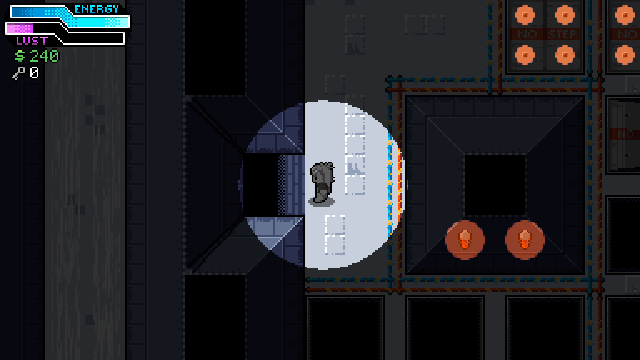
In level 3, "Hotel", in the tall room in the top right, there are steps leading into darkness, easy to miss. Explore this hidden area to find the gas mask. Beware of angry wolves.

Next time you visit the shop, you give the mask to Ashe. Before leaving, Talk to him repeatedly until the achievement pops and he starts repeating lines.

The TRUE and HONEST Ending
Finish the game with the best possible ending
Destroy all 8 P-AD cells for the good ending and get the gas mask for Ashe.
There are 3 P-AD cells in level 1, "Convention", but only 2 of those can be collected. There are 2 more each in level 3, "Hotel", and level 4, "Lab".
To find all the P-Ad cells, check my other guide, Annotated maps
In addition to this, collect the gas mask in the hidden area of Level 3, "Hotel", and deliver it to Ashe, see previous achievement.

Deja Vu
Finish the game on NG+
Finish the game normally, then load the end save game and finish it again.

Jack of All Trades
Max out your character's stats and skills
Max out STR, GUTS, WILL, LUCK and also purchase all skills.
You will need loads of money. Maxing ot STR will cost $2200, GUTS $1925, WILL $1650 and LUCK $2750. All in all, this will cost $8525 for stats and $1370 for the skills for a total of $9'895.
I recommend getting "It's a living.." early as this will get you $20 for each H scene, no matter if you initiate or the monster. "Menancing Aura" makes it easier to enact such a scene. "Luck" increases the chances you get (money) drops, but is the costliest stat.
If you do multiple runs, keep in mind you keep stats/skills on NG+.
A good place to farm money is the Hotel, the two tall rooms left of the entry point (E on map). They're filled with those christmas tree looking things that often leave behind money.

That's All
Unlock all other achievements.